Installation under Windows Server 2003 R2 SP2
1. IIS installation/configuration
2. SQL Server installation/configuration
3. Installation of Sprintometer Web Service
1. IIS installation/configuration
The following steps will ensure required IIS components are installed.
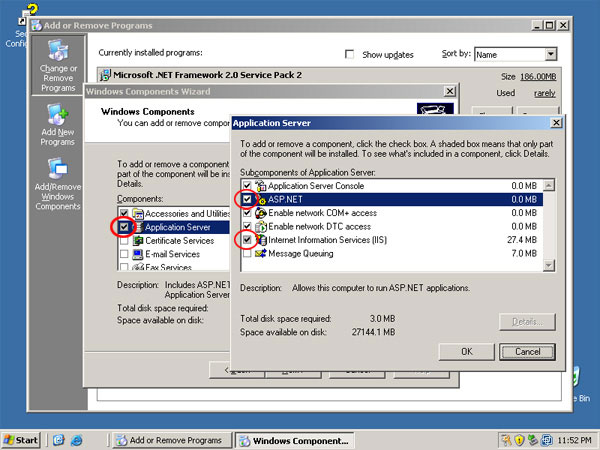
- Open Control Panel.
- Select Add or Remove Programs.
- Click Add/Remove Windows Components.
- Make sure 'Application Server' is marked.
- Select 'Application Server' and click Details
- Make sure 'Internet Information Services' is marked.
- Make sure 'ASP.NET' is marked.
2. SQL Server installation/configuration
Sprintometer Web Service requires SQL Server 2005 SP3 or SQL Server 2008. Earlier versions are not supported.
If you don't have the required version of SQL Server installed you can download and install SQL Server 2005 Express SP3 from here:
http://microsoft.com/downloads/details.aspx?FamilyID=3181842a-4090-4431-acdd-9a1c832e65a6
When you install SQL Server, make sure you select Mixed (SQL Server and Windows) authentication mode. Other options can be left with default values.
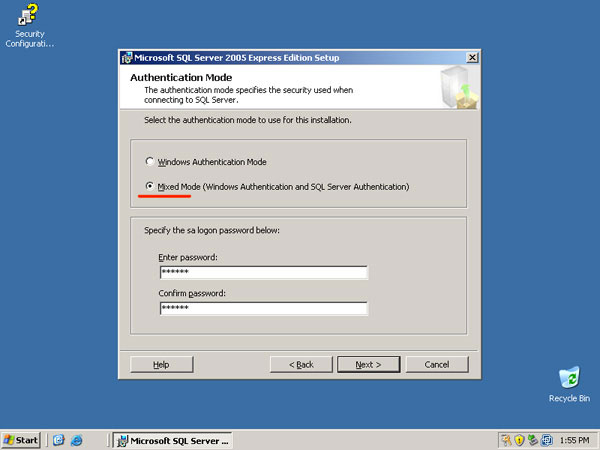
If you already have SQL Server installed and it is using Windows authentication mode, you'll have to switch it to SQL Server and Windows authentication mode following instructions from this link:
http://msdn.microsoft.com/en-us/library/ms188670.aspx
3. Sprintometer Web Service installation
Unpack sws.zip into a temporary directory and run setup.exe. Install all prerequisite software if prompted to by the installation wizard.
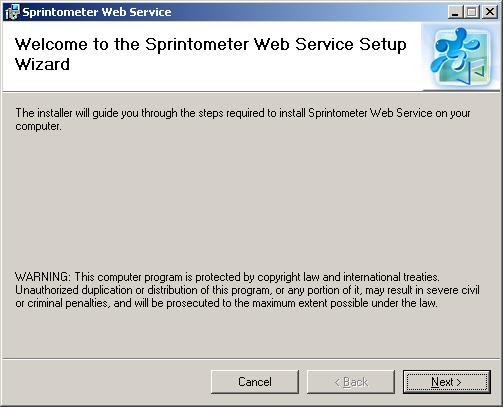
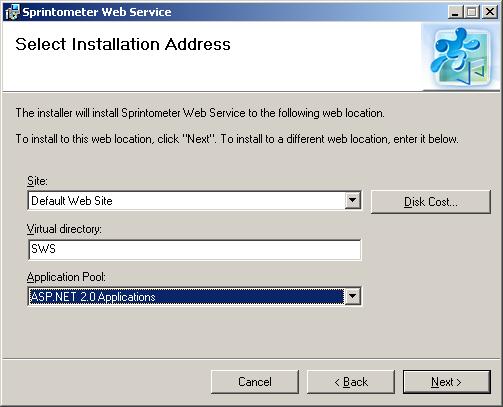
Follow the installation screens. When prompted, select the web site and application pool where you want Sprintometer Web Service to be installed.
Note that it is not allowed to mix different versions of ASP.NET in one application pool. Sprintometer Web Service is an ASP.NET 2.0 application, and thus it should be put into an Application Pool which does not contain any ASP.NET 1.1 applications. If you have multiple applications on your server, the safe practice is to create separate application pools in IIS called 'ASP.NET 2.0 Applications' and 'ASP.NET 1.1 Applications' and assign each application to the corresponding pool depending on ASP.NET version.
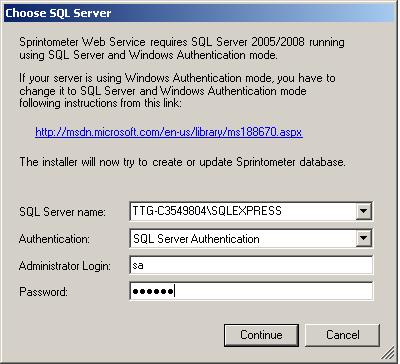
When you get to the database configuration screen, select SQL Server where you want Sprintometer database to be created and enter database administrator's password. If your server is not listed type in the name manually. The installer will create the database with name 'sprintometer' and SQL Server login 'sprintometer'. You can later change the default password for login 'sprintometer' and update application's Web.config accordingly.
Email configuration screen is self explanatory. Note that TLS and SSL are not supported in the current version, so you should use SMTP server that does not require TLS or SSL.
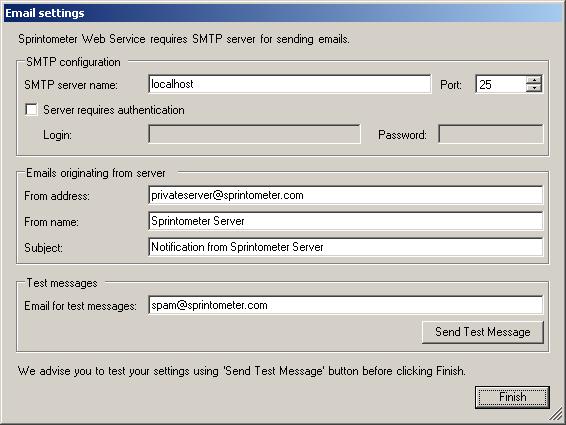
When you press 'Send Test Message' button, the following email will be sent to the 'Email for test messages':

Reboot the system to complete the installation.
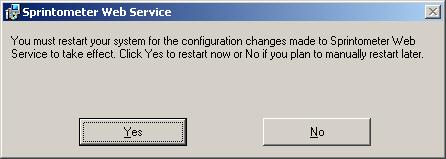
After reboot, proceed to chapter 4.
Open your web browser and go to the following URL: http://localhost/SWS/SWS.asmx
You should see this screen:
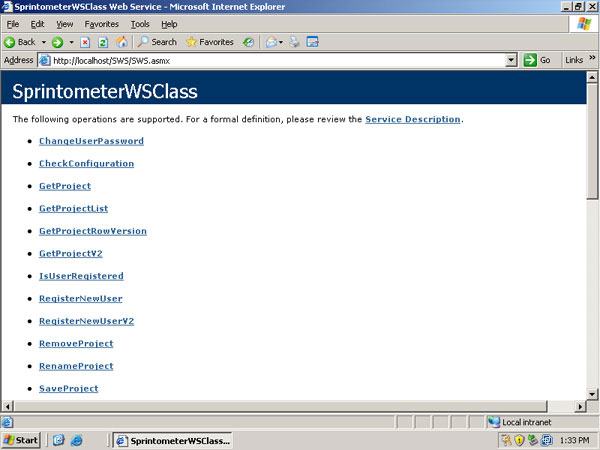
Click 'CheckConfiguration' method.
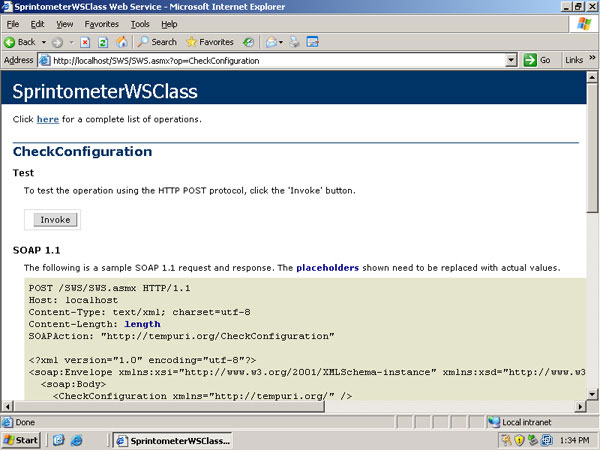
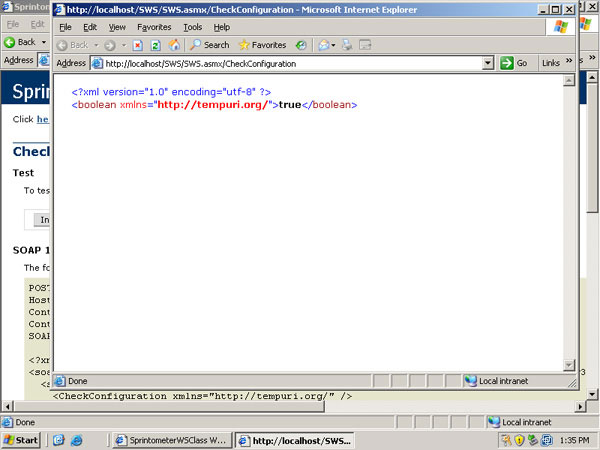
Press 'Invoke' button. If everything is OK you should see this message:
Now you can enter the URL of your new web service into Server Settings screen of your Sprintometer client. Change server URL and press OK in the settings dialog to apply your changes.
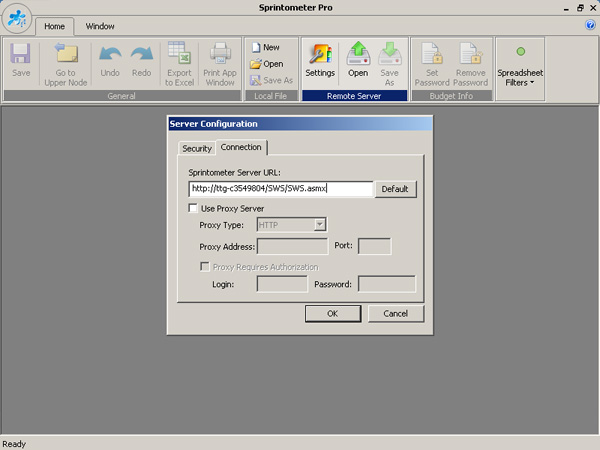
If you have not configured SSL in IIS, you need to use http: instead of https: in the server URL. Sprintometer client supports both HTTP and HTTPS protocols. If you need additional security, you can configure IIS to use SSL and disable HTTP access.
You can transfer existing projects from a different server to your new server. Open the project from the old server, then change server settings to point to the new server, then save the project on the new server using 'Save As' command. Make sure that all users assigned to this project exist on the new server under the same logins (or just remove unneeded users from the project).
Problem: The setup fails with error message "The installer was interrupted before Sprintometer Web Service could be installed. You need to restart the installer to try again".
Possible reason: ASP.NET support in IIS is not installed.
Solution: Refer to chapter 1 for information on IIS installation requirements.
Problem: The setup fails with error message "An error occured during database creation: ... (provider: SQL Network Interfaces, error: 28 - Server doesn't support requested protocol)".
Possible reason: You are trying to connect to remote SQL Server that does not have remote connections enabled.
Solution: Open SQL Server Surface Area Configuration and enable remote connections.
Problem: The installation was completed but when I open "http://localhost/SWS/SWS.asmx", I get the following error: "The current identity (NT AUTHORITY\NETWORK SERVICE) does not have write access to 'C:\WINDOWS\Microsoft.NET\Framework\v2.0.20197\Temporary ASP.NET Files'."
Possible reason: IIS was installed later than .NET Framework.
Solution: Go to command prompt, navigate to directory C:\WINDOWS\Microsoft.NET\Framework\v2.0.20197 and run this command: aspnet_regiis -ga "NT AUTHORITY\NETWORK SERVICE"
Problem: The installation was completed but when I invoke CheckConfiguration method, I get an error "System.Data.SqlClient.SqlException: Login failed for user 'sprintometer'. The user is not associated with a trusted SQL Server connection."
Possible reason: SQL Server is not using Mixed Authentication mode.
Solution: Refer to chapter 2 for information on SQL Server installation requirements.
Problem: When I open "http://localhost/SWS/SWS.asmx", I get the following error: "The specified module could not be found. (Exception from HRESULT: 0x8007007E)"
Possible reason: 'bin' subdirectory of Sprintometer Web Service is not included in system PATH.
Solution: Add Sprintometer Web Service 'bin' subdirectory (where SprintometerWS.dll is located) to the system PATH environment variable and reboot your system.
Problem: CheckConfiguration method works fine but when I replace ws.sprintometer.com with my server name in web service URL in Sprintometer client, I get the following error: "Cannot connect to server. Error code: 7 (Couldn't connect to server)"
Possible reason: HTTPS protocol is not supported by your server.
Solution: Make sure you either use http:// instead of https:// or enable SSL on your web server.
Problem: When I save my project on the new server, I get the following error: "Cannot connect to server. SOAP Error: Server was unable to process request. ---> The INSERT statement conflicted with the FOREIGN KEY constraint 'FK_ProjectUser_User'."
Possible reason: Some user logins assigned to this project are not registered on the new server.
Solution: Make sure that all assigned users exist on the new server or just remove unneeded users from the project.